
If you’ve never made coconut cream pie from scratch, you’re seriously missing out. Store-bought versions can’t even compare to this homemade masterpiece.
I’ve been perfecting this best coconut cream pie recipe for years. It’s become my signature dessert—the one everyone requests for holidays, birthdays, and random Tuesday nights.
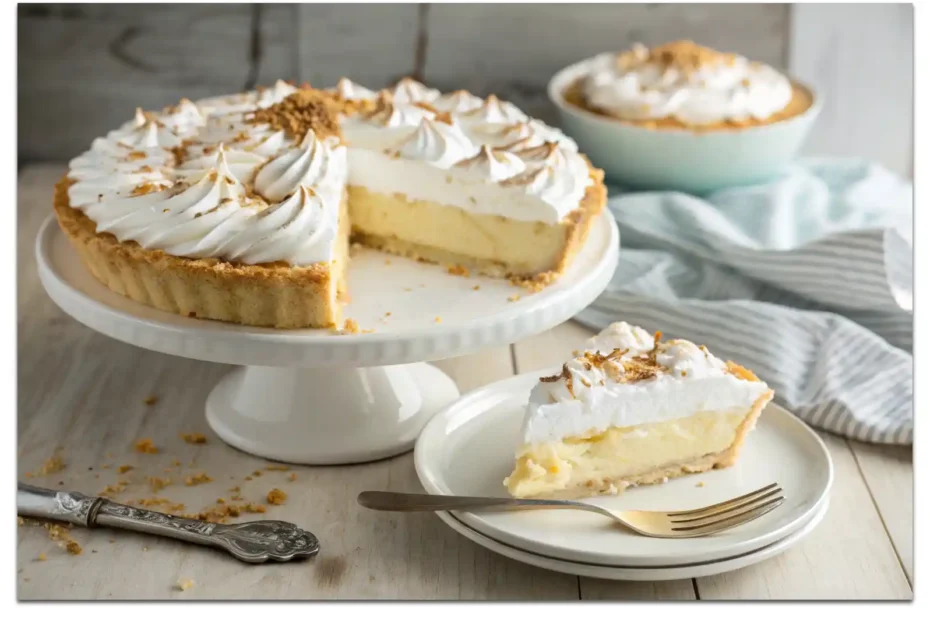
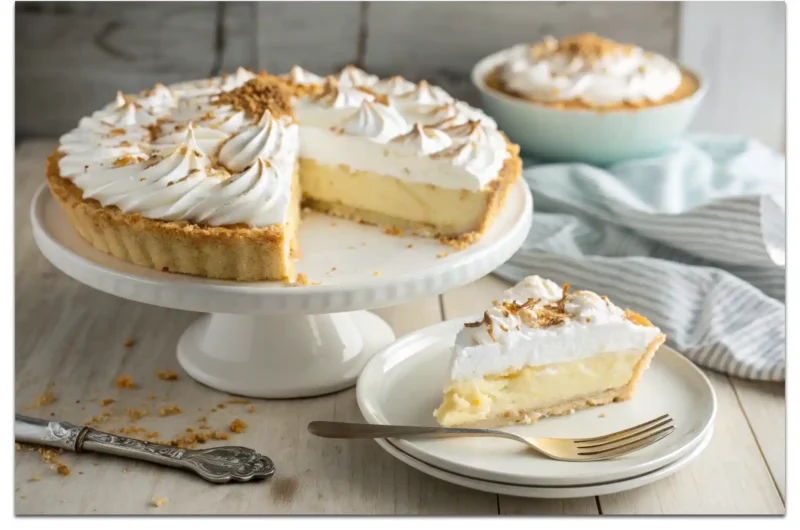
This easy coconut cream pie features a flaky crust, silky custard filling loaded with coconut, and clouds of whipped cream on top. It’s basically heaven on a plate.
Prep Time: 30 minutes
Chill Time: 4 hours
Total Time: 4 hours 30 minutes
Servings: 8 slices
Why This Coconut Cream Pie Works
Most coconut pie recipe versions either use instant pudding (boring) or have grainy, overcooked filling (disaster). This one gets the texture absolutely perfect every single time.
The secret is cooking the coconut cream pie filling low and slow while stirring constantly. Yeah, it requires attention, but the silky-smooth result makes it totally worth it.
Using both sweetened coconut flakes and coconut extract gives you maximum coconut flavor without being overwhelming. Some recipes go too far—this one finds the sweet spot.
IMO, this beats any restaurant coconut cream dessert you’ve ever had. Plus, you get to control the sweetness level and pile on extra whipped cream without judgment.
Ingredients You’ll Need
Here’s everything for this coconut crème pie recipe. The ingredients are straightforward—nothing weird or hard to find at your regular grocery store.
For the Crust:
- 1 pre-made 9-inch pie crust (or homemade if you’re feeling ambitious)
- 1 egg white, lightly beaten
For the Filling:
- 2/3 cup granulated sugar
- 1/4 cup cornstarch
- 1/4 teaspoon salt
- 3 cups whole milk
- 4 large egg yolks
- 2 tablespoons butter
- 1 1/2 teaspoons vanilla extract
- 1 teaspoon coconut extract
- 1 1/2 cups sweetened shredded coconut
For the Topping:
- 1 1/2 cups heavy whipping cream
- 3 tablespoons powdered sugar
- 1/2 teaspoon vanilla extract
- 1/2 cup toasted coconut flakes for garnish
Using whole milk instead of low-fat makes a huge difference in richness. Don’t cheap out here—this is dessert, not diet food.
How To Make The Best Coconut Cream Pie
Alright, let’s break this down step by step. I’ll walk you through the process like we’re making this together in my kitchen right now.
Step 1: Prepare and Blind Bake the Crust
Preheat your oven to 375°F (190°C). If using a store-bought crust, remove it from the packaging and place it in a 9-inch pie dish.
Prick the bottom and sides with a fork about 10-15 times. This prevents the crust from puffing up while it bakes—crucial for a flat bottom.
Line the crust with parchment paper and fill it with pie weights, dried beans, or uncooked rice. This keeps the sides from slumping during baking.
Bake for 15 minutes with the weights, then carefully remove the parchment and weights. Brush the crust with beaten egg white and bake another 5-7 minutes.
The egg white creates a barrier that prevents the filling from making the crust soggy later. It’s a game-changer that most people skip.
Let the crust cool completely on a wire rack. Don’t rush this—adding hot filling to a warm crust causes problems you don’t want to deal with.
Step 2: Toast Your Coconut
While the crust bakes, spread your coconut flakes on a baking sheet in a single layer. Pop them in the oven at 350°F for 5-7 minutes.
Stir them every 2 minutes to prevent burning. They go from golden to burnt in seconds, so watch them closely. This step is crucial for flavor.
Once golden and fragrant, remove them immediately and let them cool. You’ll use half in the filling and half for garnish on top.
Toasted coconut has so much more flavor than raw coconut. This extra step takes barely any time but makes a noticeable difference in taste.
Step 3: Make the Custard Base
In a medium saucepan, whisk together the sugar, cornstarch, and salt until there are no lumps. This dry mixing prevents clumping when you add liquid.
Gradually pour in the milk while whisking constantly. You want a smooth mixture with no cornstarch lumps hiding anywhere in there.
Place the pan over medium heat and cook, stirring constantly with a whisk or wooden spoon. This takes patience—about 8-10 minutes until it thickens.
The mixture will go from thin and milky to thick and pudding-like. You’ll know it’s ready when it coats the back of a spoon and holds its shape.
Step 4: Temper the Egg Yolks
In a separate bowl, whisk your egg yolks until they’re smooth and slightly lighter in color. Get them nice and broken up first.
Slowly ladle about half a cup of the hot milk mixture into the yolks while whisking constantly. This gradually raises the temperature of the yolks.
This tempering process prevents the eggs from scrambling when they hit the hot mixture. Rush this step and you’ll have sweet coconut scrambled eggs—trust me.
Once tempered, pour the egg mixture back into the saucepan with the rest of the hot milk. Whisk it all together thoroughly and smoothly.
Step 5: Finish Cooking the Filling
Return the pan to medium heat and cook for another 2-3 minutes, stirring constantly. The filling will thicken further and become glossy and smooth.
Remove from heat and immediately stir in the butter, vanilla extract, and coconut extract. The butter adds richness and helps create that silky texture.
Fold in 1 cup of the toasted coconut (save the rest for topping). Mix it in gently but thoroughly so it’s evenly distributed throughout.
Let the filling cool for about 5 minutes, stirring occasionally. This prevents a skin from forming on top, which would create an unpleasant texture later.
Step 6: Fill the Pie Crust
Pour the warm coconut custard pie recipe filling into your cooled pie crust. Use a spatula to spread it evenly and smooth the top surface.
Press a piece of plastic wrap directly onto the surface of the filling. This contact prevents that dreaded skin from forming as it cools.
Refrigerate for at least 4 hours, but overnight is even better. The filling needs time to set completely—rushing this results in a runny mess when you cut it.
I know waiting is hard when it smells this good, but patience pays off. A properly chilled pie slices cleanly and holds its shape beautifully.
Step 7: Make Fresh Whipped Cream
About 30 minutes before serving, make your whipped cream topping. Pour cold heavy cream into a chilled bowl—cold everything makes stiffer peaks.
Add the powdered sugar and vanilla extract. Beat with an electric mixer on medium-high speed until soft peaks form, about 2-3 minutes.
Don’t overbeat or you’ll end up with butter instead of whipped cream. Stop when the cream holds its shape but still looks soft and pillowy.
FYI, homemade whipped cream beats store-bought every single time. It’s lighter, tastes better, and takes literally three minutes to make from scratch.
Step 8: Top and Garnish
Remove the plastic wrap from your chilled pie. Spread or pipe the whipped cream over the entire surface, covering the coconut cream filling completely.
You can spread it smooth with an offset spatula or pipe decorative rosettes with a piping bag. Either way looks impressive and tastes amazing.
Sprinkle the remaining toasted coconut over the whipped cream. Press it gently into the cream so it sticks and doesn’t fall off when you slice.
For extra flair, you can add some chocolate shavings or drizzle melted chocolate over the top. Not traditional, but absolutely delicious if you’re into that.
Variations Worth Trying
Once you’ve mastered this basic coconut pie recipe easy version, these variations let you explore different flavor combinations while keeping the same technique.
Coconut Meringue Pie: Skip the whipped cream and top with fluffy meringue instead. Brown it with a kitchen torch for that classic diner look.
Chocolate Coconut: Add 2 ounces of melted dark chocolate to the filling. You get a coconut dessert recipes twist that tastes like a candy bar.
Coconut Pudding Style: Make just the filling without the crust. Layer it in glasses with whipped cream and toasted coconut for individual servings.
Coconut Pie Recipe Old Fashioned: Use a homemade pastry crust and coconut custard pie recipe for that traditional grandmother’s kitchen vibe everyone loves.
You could even turn the filling into easy puddings by skipping the crust entirely. Serve it in ramekins topped with whipped cream for a simpler presentation.
Comparing to Other Cream Pies
How does this stack up against other popular cream pie recipes? Let me break down the differences based on years of baking experience.
Versus Vanilla Cream Pie: That’s basically this without the coconut. Same technique, less flavor. Coconut adds texture and interest vanilla can’t match alone.
Versus Lemon Cream Pie: Lemon is tangier and brighter. Coconut is richer and more mellow. Both excellent, totally different moods and flavor profiles here.
Versus Chocolate Cream: Chocolate is richer and more decadent. Coconut feels lighter and more tropical. Depends on your craving which one wins.
Versus Banana Cream: Banana has fruit chunks and different texture. Coconut’s texture comes from the flakes, which I personally prefer for consistency.
Each cream pie has fans, but this best coconut cream pie recipes version offers the most interesting texture from those toasted coconut flakes throughout.
Storage and Make-Ahead Tips
Good news—this easy coconut cream pie actually benefits from being made ahead. Here’s how to handle storage and planning for maximum convenience.
Refrigerator Storage: Cover the whole pie with plastic wrap or store in an airtight container. It keeps beautifully for up to 3 days in the fridge.
Crust Prep: You can blind bake the crust up to 2 days ahead. Wrap it tightly and store at room temperature until you’re ready to fill it.
Filling Ahead: Make the filling a day early and store it in a bowl with plastic wrap on the surface. Pour into the crust the next day.
Whipped Cream: Always make this fresh, within an hour of serving. Whipped cream doesn’t hold well overnight—it deflates and gets watery. Fresh is mandatory.
The assembled pie without whipped cream can sit in the fridge for 2-3 days. Add the cream right before serving for the best presentation and texture.
Common Mistakes to Avoid
I’ve made every possible mistake with coconut cream recipes over the years. Here’s how to avoid the disasters that’ll ruin your beautiful pie.
Not Stirring Constantly: Walk away from that custard and you’ll get scorched spots or lumps. Constant stirring is non-negotiable for smooth, perfect filling.
High Heat: Cooking custard on high heat makes it grainy or causes it to curdle. Medium heat with patience creates that silky texture you want.
Skipping Tempering: Dumping cold eggs directly into hot liquid scrambles them instantly. Take the extra 30 seconds to temper properly—it matters hugely here.
Soggy Crust: Not blind baking or skipping the egg white wash leads to soggy bottom crust. Nobody wants that—follow both steps religiously.
Cutting Too Soon: Slice into warm pie and everything oozes out messily. Wait for that full chill time before cutting for clean, pretty slices.
Pro Tips for Bakery-Quality Results
Want your homemade pie to rival professional bakeries? These expert tips make all the difference between good and absolutely spectacular pie.
Use Quality Coconut: Get good sweetened shredded coconut, not the cheap stuff. Better coconut means better flavor throughout the entire dessert.
Chill Your Bowl: When making whipped cream, put your bowl in the freezer for 10 minutes first. Cold bowl makes stiffer, more stable whipped cream.
Strain the Filling: For ultra-smooth filling, strain it through a fine-mesh sieve before adding the coconut. This catches any overcooked bits or lumps.
Toast Extra Coconut: Make more toasted coconut than you need. It’s addictive as a snack and you might eat half before the pie is done.
Serve Cold: This pie tastes best when properly chilled. Let it come to just-barely-fridge temperature for the ideal texture and flavor combination.
Perfect Occasions for Coconut Cream Pie
This best coconut cream pie recipes creation works for so many occasions. I’ve served it in countless situations and it always impresses everyone present.
Holiday Dinners: It’s lighter than pumpkin pie but still feels festive. Perfect for Thanksgiving or Christmas when you want something different but special.
Summer Gatherings: The tropical coconut flavor screams summer even though it’s a no-bake filling. Great for picnics and barbecues when it’s too hot to bake.
Potlucks: This travels well and feeds a crowd. Plus, it looks impressive enough that people think you spent way more effort than you actually did.
Special Birthdays: Skip the cake and make this instead. Some people prefer pie to cake anyway, and this coconut cream dessert definitely delivers wow factor.
The coconut dessert recipes category is underrated for celebrations. This pie brings something special to any table without being too heavy or overwhelming.
Why Homemade Beats Store-Bought
After making this easy bundt cake recipes—wait, wrong dessert. After making this coconut pie recipe from scratch, you’ll never buy store-bought coconut cream pie again.
Texture: Homemade custard has that silky smoothness that packaged pudding can’t replicate. The difference is immediately obvious when you taste them side by side.
Freshness: Fresh whipped cream beats Cool Whip by miles. It’s lighter, tastes better, and doesn’t have that chemical aftertaste some frozen toppings have.
Coconut Flavor: Store-bought versions barely taste like coconut. This one delivers real, intense coconut flavor from both extract and toasted flakes throughout.
Control: You decide the sweetness level, coconut amount, and cream height. Make it exactly how you like it without compromising on any element.
The extra effort is minimal compared to the massive improvement in taste and texture. Once you go homemade, there’s honestly no going back to store versions.
FAQs
Can I use coconut milk instead of regular milk?
You can, and it’ll make the coconut flavor even stronger. Just use full-fat canned coconut milk for the right consistency. Light coconut milk won’t work well.
How do I prevent the crust from getting soggy?
Blind bake it fully, brush with egg white, and make sure both crust and filling are completely cool before assembly. These steps create a moisture barrier.
Can I freeze coconut cream pie?
The filling freezes okay, but whipped cream doesn’t freeze well at all. I’d recommend freezing just the filled crust, then adding fresh cream after thawing.
What if my filling doesn’t thicken?
You probably didn’t cook it long enough or used low-fat milk. Return it to heat and cook longer, stirring constantly until it coats the spoon properly.
Can I make this dairy-free?
Yes! Use coconut cream instead of milk and dairy-free butter. Skip the whipped cream or use coconut whipped cream. It’s naturally suited for dairy-free conversion.
Coconut Cream Pie Recipe: The Dessert That Ends All Arguments
8
servings4
hours30
minutesThis coconut cream pie features a blind-baked flaky crust filled with silky coconut custard made from scratch with whole milk, egg yolks, and toasted coconut flakes. Topped with fresh whipped cream and more toasted coconut, it requires 4 hours chilling time but delivers bakery-quality results worth the wait.
Ingredients
- Crust:
-
1 pre-made 9-inch pie crust
-
1 egg white, lightly beaten
- Filling:
-
2/3 cup granulated sugar
-
1/4 cup cornstarch
-
1/4 teaspoon salt
-
3 cups whole milk
-
4 large egg yolks
-
2 tablespoons butter
-
1 1/2 teaspoons vanilla extract
-
1 teaspoon coconut extract
-
1 1/2 cups sweetened shredded coconut
- Topping:
-
1 1/2 cups heavy whipping cream
-
3 tablespoons powdered sugar
-
1/2 teaspoon vanilla extract
-
1/2 cup toasted coconut flakes
How To Make
- Preheat oven to 375°F
- Prick pie crust with fork 10-15 times
- Line with parchment and fill with pie weights
- Bake 15 minutes with weights
- Remove weights and parchment
- Brush crust with beaten egg white
- Bake additional 5-7 minutes until golden
- Cool crust completely on wire rack
- Toast coconut flakes at 350°F for 5-7 minutes, stirring every 2 minutes
- Whisk sugar, cornstarch, and salt in saucepan
- Gradually whisk in milk until smooth
- Cook over medium heat 8-10 minutes, stirring constantly until thick
- Whisk egg yolks in separate bowl
- Slowly ladle 1/2 cup hot mixture into yolks while whisking
- Pour tempered yolks back into saucepan
- Cook 2-3 minutes more, stirring constantly
- Remove from heat and stir in butter, vanilla, and coconut extract
- Fold in 1 cup toasted coconut
- Cool filling 5 minutes, stirring occasionally
- Pour into cooled pie crust and smooth top
- Press plastic wrap directly on filling surface
- Refrigerate at least 4 hours or overnight
- Beat cold heavy cream with powdered sugar and vanilla until soft peaks form
- Remove plastic wrap from pie
- Spread or pipe whipped cream over filling
- Sprinkle remaining toasted coconut on top
- Refrigerate until serving
Final Thoughts on Coconut Cream Pie
So there you have it—everything you need to make incredible coconut cream pie from scratch. This recipe has brought me more compliments than any other dessert.
It’s rich but not heavy, sweet but not cloying, and that coconut flavor is perfectly balanced. The texture combination of creamy filling, flaky crust, and soft cream is unbeatable.
Once you make this a few times, it becomes easy and automatic. You’ll find yourself making it for every occasion that calls for impressive dessert.
Now stop reading and get baking. Your kitchen is about to smell like a tropical paradise, and your taste buds are in for a serious treat!