
Think making crème brûlée is complicated? Wrong. This elegant French dessert is way easier than you’d imagine—and tastes better than most restaurants serve.
I’ve been making this homemade creme brulee for years. It started when I got tired of paying fifteen bucks for it at fancy restaurants when I could make it myself.
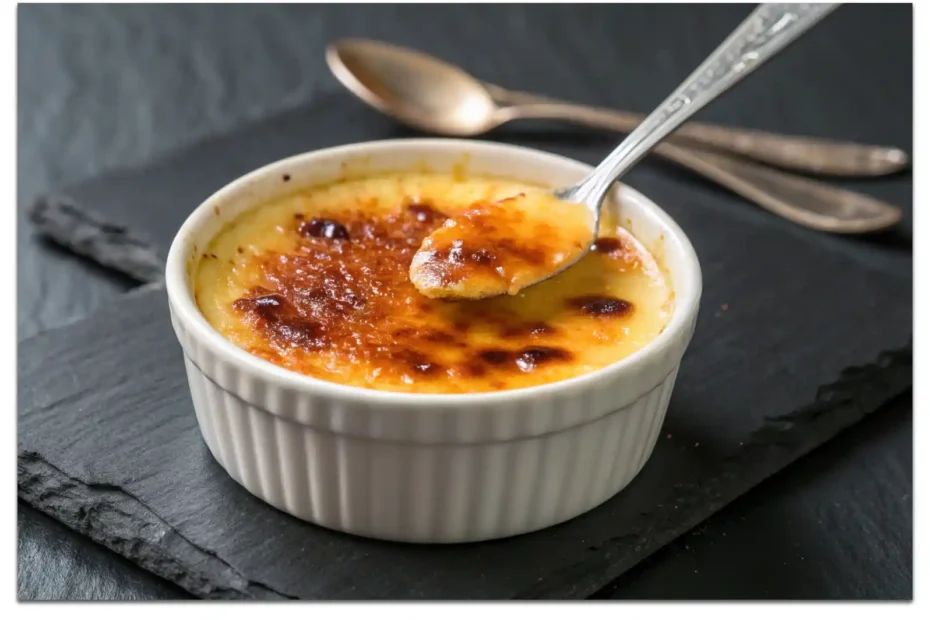
This easy creme brulee recipe features silky vanilla custard with that signature caramelized sugar top. It’s the perfect balance of creamy and crunchy in every spoonful.
Prep Time: 15 minutes
Bake Time: 40-45 minutes
Chill Time: 2-4 hours
Total Time: 3-5 hours
Servings: 6 ramekins
Why This Crème Brûlée Works
Most basic creme brulee recipes either turn out eggy or too sweet. This one nails that perfect custard texture—silky smooth without being rubbery or grainy.
The secret is the temperature. Low and slow baking in a water bath prevents the eggs from scrambling. This creates that signature creamy texture restaurants charge premium prices for.
Using real vanilla beans instead of extract makes a massive difference. You see those beautiful vanilla specks throughout—that’s how you know it’s the real deal here.
IMO, this beats any gourmet creme brulee recipe because it’s straightforward. No weird techniques or ingredients—just quality basics executed perfectly every single time.
Ingredients You’ll Need
Here’s everything for this easy creme brulee recipe simple enough for beginners. Five ingredients create restaurant-quality results that’ll blow everyone’s minds completely.
For the Custard:
- 2 cups heavy cream
- 1 vanilla bean (or 2 teaspoons vanilla extract)
- 5 large egg yolks
- 1/3 cup granulated sugar
- Pinch of salt
For the Topping:
- 6 tablespoons granulated sugar (for caramelizing)
That’s it. Seriously. The simplicity is what makes this so elegant. Quality ingredients doing exactly what they’re supposed to do without complications or fuss.
Using heavy cream instead of half-and-half creates proper richness. This isn’t the time to cut calories—embrace the decadence that makes crème brûlée special.
Equipment You’ll Need
Before starting, gather these tools. Having everything ready makes the process smooth instead of stressful and chaotic when you’re juggling hot cream and eggs.
Essential:
- 6 ramekins (4-6 oz each)
- Large baking dish for water bath
- Fine-mesh strainer
- Whisk
- Kitchen torch (or broiler)
The kitchen torch isn’t optional if you want that perfect caramelized top. Broilers work but torches give you way more control over the caramelization.
Ramekins should be ceramic or oven-safe. Those little white ones you see everywhere work perfectly. No need for anything fancy or specialized here at all.
How To Make Perfect Crème Brûlée
Alright, let’s get into the actual process. I’ll walk you through every step with all the details that actually matter for nailing this first try.
Step 1: Prep Your Vanilla
If using a vanilla bean, split it lengthwise with a sharp knife. Scrape out all those tiny seeds using the back of your knife blade.
You want every last seed—that’s where the flavor lives. Don’t waste any by leaving them stuck in the pod after scraping it thoroughly.
If using extract instead, you’ll add it later with the egg mixture. Vanilla bean goes in with the cream now for maximum flavor extraction.
The pod itself goes into the cream too. It contains tons of flavor that infuses during heating, so don’t throw it away yet.
Step 2: Heat the Cream
Pour heavy cream into a medium saucepan. Add the vanilla seeds and scraped pod if using a vanilla bean for this recipe.
Heat over medium heat until it just starts to simmer—you’ll see tiny bubbles forming around the edges. Don’t let it boil hard or you’ll scorch it.
Remove from heat immediately once simmering. Let it steep for 10 minutes so the vanilla infuses fully into the cream throughout.
This steeping time is crucial for flavor. Rushing it means weak vanilla flavor that disappoints. Patience pays off enormously in the final result here.
Step 3: Mix Egg Yolks and Sugar
While cream steeps, whisk together egg yolks and sugar in a medium bowl. Whisk until the mixture turns pale yellow and slightly thick.
You’re not making meringue here—just combining them thoroughly. About 1-2 minutes of whisking does the job perfectly without over-aerating everything.
Add a pinch of salt. It enhances flavors and balances the sweetness without making the custard taste salty at all. Trust this step.
If you used vanilla extract instead of beans, add it now. Whisk it in thoroughly so the flavor distributes evenly throughout the mixture.
Step 4: Temper the Eggs
Remove the vanilla pod from the warm cream. Slowly pour about half a cup of hot cream into the egg mixture while whisking constantly.
This tempering process gradually raises the egg temperature. Dump all the hot cream in at once and you’ll have sweet scrambled eggs instead.
Add another ladle of cream, whisking continuously. You’re building up the egg temperature slowly so they don’t cook instantly when fully combined.
Now pour the tempered egg mixture back into the saucepan with the remaining cream. Whisk everything together until completely smooth and uniform throughout.
Step 5: Strain and Pour
Pour the custard through a fine-mesh strainer into a large measuring cup or bowl with a spout. This catches any cooked egg bits.
Straining also removes the vanilla pod if you forgot to take it out earlier. The result is ultra-smooth custard without any lumps anywhere.
Arrange your ramekins in a large baking dish. Pour the custard evenly among them, filling each about three-quarters full for proper cooking.
A measuring cup with a spout makes pouring clean and easy. If you don’t have one, a ladle works—just go slowly to avoid spills.
Step 6: Create Water Bath
Place the baking dish with ramekins into your preheated 325°F oven. Now carefully pour hot water into the dish around the ramekins.
Fill until the water reaches halfway up the sides of the ramekins. This water bath insulates them and ensures gentle, even cooking throughout.
The water prevents the edges from overcooking while the centers set. It’s the secret to that perfect creamy vanilla creme brulee texture everyone loves.
Be careful not to splash water into the custards. If you do, scoop it out with a spoon immediately before it ruins the texture.
Step 7: Bake Low and Slow
Bake for 40-45 minutes until the custards are set but still slightly jiggly in the center. They should wobble like jello, not slosh like liquid.
The centers will look slightly underdone—that’s perfect. They continue cooking from residual heat after you remove them from the oven completely.
Don’t overbake or you’ll get grainy, eggy custard. Better to underbake slightly than overbake. They firm up more as they cool anyway.
Check at 40 minutes by gently shaking a ramekin. If the edges are set and only the center jiggles, you’re done baking.
Step 8: Cool and Chill
Carefully remove the baking dish from the oven. Let the ramekins sit in the water bath for 10 minutes to cool gradually.
This gradual cooling prevents the custards from cracking or curdling. Going from hot oven straight to cold fridge shocks them and ruins texture.
Transfer ramekins to a wire rack. Let them cool to room temperature, then cover each with plastic wrap and refrigerate for at least 2 hours.
Overnight chilling is even better. The custards firm up completely and the flavors develop. This how to make creme brulee step requires patience but delivers results.
Step 9: Caramelize the Sugar
Right before serving, sprinkle 1 tablespoon of sugar evenly over each custard. Tilt and tap to coat the entire surface with a thin layer.
Hold your kitchen torch about 2-3 inches from the sugar. Move it constantly in circular motions until the sugar melts and caramelizes golden brown.
You want that glass-like top that cracks when you tap it. Keep torching until it’s deep amber—light caramel tastes bland and doesn’t crack properly.
Let the caramelized top harden for 2-3 minutes before serving. It sets into that signature crunchy shell that makes crème brûlée so satisfying.
Variations Worth Trying
Once you’ve mastered this quick creme brulee recipe, these creme brulee flavors let you explore while keeping the same basic technique throughout.
Coffee Creme Brulee: Add 2 tablespoons instant espresso powder to the hot cream. Perfect for coffee lovers who want that mocha-like richness.
Banana Creme Brulee: Fold in mashed ripe banana before baking. Creates a unique tropical twist on the French classic everyone knows.
Chocolate: Add 4 oz melted dark chocolate to the hot cream mixture. Stir until smooth for a decadent chocolate version that’s incredible.
Lavender: Steep 1 tablespoon culinary lavender with the vanilla. Strain it out before adding eggs. Floral and elegant for special occasions.
You could even turn this into creme brulee cake by using the custard as filling between cake layers. Gets creative with this versatile base.
Common Mistakes to Avoid
I’ve messed this up enough times to know exactly what goes wrong. Here’s how to avoid disasters that ruin perfectly good crème brûlée attempts.
Skipping Water Bath: Baking without it creates rubbery, overcooked edges. The water bath is non-negotiable for proper texture throughout the custard.
Overbaking: Custard should jiggle in the center when done. Overbaking makes it grainy and eggy instead of silky smooth like it should be.
Not Straining: Lumps ruin the experience. Always strain to catch any cooked egg bits or vanilla pod pieces before pouring into ramekins.
Wet Custard Surface: Pat the tops dry before adding sugar if they’ve condensed moisture. Wet surfaces prevent proper caramelization from happening.
Burning the Sugar: Hold the torch too long in one spot and you’ll burn it bitter. Keep moving for even caramelization across the entire surface.
Why Homemade Beats Restaurants
FYI, after making this dozens of times, I rarely order crème brûlée out anymore. The homemade version consistently beats restaurant versions for several reasons.
Freshness: You make it the same day you serve it. Restaurants often make custards days ahead, affecting texture and flavor quality over time.
Quality Control: You choose premium vanilla and fresh eggs. Restaurants cut corners on ingredients to maintain profit margins on menu items.
Customization: Want it less sweet? Adjust. Prefer more vanilla? Add it. You control everything to match your exact preferences perfectly here.
Cost: This recipe costs maybe eight dollars for six servings. That’s one restaurant portion, max. The savings add up fast over time.
The satisfaction of making this yourself is priceless. Watching people’s faces when you serve homemade crème brûlée never gets old ever.
Storage and Make-Ahead Tips
This creamy creme brulee recipe is perfect for entertaining because you can prep everything ahead. Here’s how to handle timing and storage properly.
Custards: Make them up to 3 days ahead. Store covered in the fridge until ready to caramelize the tops right before serving.
Don’t Caramelize Early: The sugar top softens within 30 minutes from moisture. Always torch right before serving for that perfect crack everyone loves.
Freezing: Don’t. Custards don’t freeze well—they get watery and grainy when thawed. This dessert requires fresh preparation for best results.
Serving Temperature: Serve chilled with warm caramelized top. The temperature contrast is part of the experience and what makes it special.
Make the custards the night before your dinner party. Caramelize them while guests finish their main course. Perfect timing every single time.
Perfect Occasions for Crème Brûlée
These creme brulee desserts work for so many occasions. I’ve served them at countless events and they always steal the show without fail.
Dinner Parties: They’re elegant and impressive but don’t require last-minute stress. Make ahead and torch when ready—perfect for entertaining guests.
Date Nights: Nothing says romance like cracking into crème brûlée together. It’s sophisticated without being pretentious or trying too hard.
Holidays: A lighter option than heavy pies and cakes. The individual servings make portioning easy after big holiday meals with family.
Special Celebrations: Birthdays, anniversaries, or any time you want to elevate a meal. This creme brulee aesthetic screams celebration and luxury.
Honestly, you don’t need a special occasion. Tuesday night deserves crème brûlée too if you’re craving something special and memorable.
Pro Tips for Restaurant Quality
Want your homemade version to rival French restaurants? These expert tips make all the difference between good custard and absolutely exceptional custard.
Room Temperature Eggs: Cold eggs don’t incorporate smoothly. Let them sit out for 30 minutes before starting for better mixing and texture.
Quality Vanilla: Real vanilla beans or premium extract matter enormously. Cheap vanilla tastes artificial and ruins the entire dessert’s flavor profile.
Proper Ramekins: Use shallow, wide ramekins for best texture. Deep ones create uneven cooking with overcooked edges and undercooked centers throughout.
Even Sugar Layer: Tap excess sugar off before torching. Thick spots burn before thin spots caramelize. An even layer creates perfect caramelization.
Multiple Torch Passes: Don’t try to caramelize in one go. Make several passes, letting it cool between. This creates deeper color and flavor.
FAQs
Can I use a broiler instead of a kitchen torch?
Yes, but it’s tricky. Place ramekins close to the broiler and watch constantly. The torch gives way more control and even caramelization overall.
Why is my custard grainy?
Either overbaked or eggs weren’t tempered properly. Always use a water bath and check for that slight jiggle at 40 minutes exactly.
Can I make this dairy-free?
Coconut cream works as substitute, but the texture differs. It’s good but not the same as traditional crème brûlée made with dairy.
How do I know when it’s done baking?
Gently shake a ramekin. Edges should be set, center should jiggle like jello. If it sloshes like liquid, bake 5 more minutes.
What if I don’t have ramekins?
Use any oven-safe ceramic dishes. Coffee cups work in a pinch. Just adjust baking time based on size and depth of containers.

Crème Brûlée Recipe: The Dessert That Impresses Everyone
6
servings4
hoursThis classic crème brûlée features silky vanilla custard baked in a water bath until just set, then chilled for hours. Before serving, sprinkle sugar on top and caramelize with a kitchen torch for that signature crackly caramel shell. Takes about 3-5 hours total including chilling time, serving six people.
Ingredients
- Custard:
-
2 cups heavy cream
-
1 vanilla bean (or 2 teaspoons vanilla extract)
-
5 large egg yolks
-
1/3 cup granulated sugar
-
Pinch of salt
- Topping:
-
6 tablespoons granulated sugar
How To Make
- Preheat oven to 325°F
- Split vanilla bean and scrape out seeds
- Heat cream with vanilla seeds and pod until simmering
- Remove from heat and steep 10 minutes
- Whisk egg yolks with sugar until pale
- Add salt and vanilla extract if using
- Remove vanilla pod from cream
- Slowly pour hot cream into eggs while whisking
- Add remaining cream gradually while whisking
- Strain mixture through fine-mesh strainer
- Arrange ramekins in baking dish
- Pour custard evenly into ramekins
- Place dish in oven, add hot water halfway up ramekins
- Bake 40-45 minutes until edges set, center jiggles
- Cool in water bath 10 minutes
- Transfer to wire rack to cool completely
- Cover with plastic wrap and refrigerate 2+ hours
- Before serving, sprinkle 1 tablespoon sugar on each
- Torch sugar until golden brown and caramelized
- Let harden 2-3 minutes before serving
Final Thoughts on Crème Brûlée
So there you have it—everything you need to make incredible crème brûlée at home. This recipe has impressed more people than any other dessert I make.
It’s elegant enough for special occasions but easy enough for random weeknights when you want something special. The technique is simpler than people think.
Once you make this a few times, it becomes automatic. You’ll find yourself making it constantly because nothing beats that caramelized sugar crack.
Now stop reading and start making. Your kitchen is about to smell like a French patisserie, and your dessert game will never be the same!