
Remember the first time you saw those adorable ring-shaped donuts with the bubbly texture? Yeah, mochi donuts changed the game completely. They’re crispy outside, chewy inside, and honestly? Regular donuts can’t compete anymore.
I first tried these at a trendy café and immediately thought, “I need to make these at home.” Turns out, they’re not as intimidating as they look. Just a bit different from your standard donut recipe.
Servings: 8 mochi donuts
Prep Time: 15 minutes
Cook Time: 15 minutes
Total Time: 30 minutes
What Makes Mochi Donuts So Special?
Here’s the deal—mochi donuts aren’t your grandma’s donuts. They use sweet rice flour (mochi flour) which gives them that signature chewy texture. It’s like someone combined the best parts of Japanese mochi and American donuts.
The texture is completely unique. Crispy edges meet a chewy, almost bouncy interior. Regular donuts feel heavy by comparison. These feel lighter, airier, yet somehow more satisfying.
And that bubble ring shape? It’s not just for looks. Each little bubble gets extra crispy, giving you multiple texture experiences in one bite. Pretty genius, right?
The Korean Donut Craze Explained
Korean donuts took social media by storm for good reason. They’re ridiculously photogenic with their donuts aesthetic appeal. But beyond the Instagram factor, they actually taste incredible.
The Korean mochi influence brings that beloved chewy texture Asians have enjoyed for centuries. Western baking techniques add the crispy, golden exterior. It’s a beautiful cultural fusion that works perfectly.
These aren’t just pretty faces. The flavor combinations are wild—matcha glaze, black sesame, ube, strawberry. Way more adventurous than your typical chocolate or vanilla options.
Ingredients You’ll Need for the Perfect Batch
Let’s break down what makes these mochi desserts work. Nothing too crazy, but you will need some specific items.
For the Donuts:
- 1 cup sweet rice flour (mochiko)
- ½ cup all-purpose flour
- ⅓ cup granulated sugar
- 1½ teaspoons baking powder
- ¼ teaspoon salt
- 1 large egg
- ½ cup whole milk
- 2 tablespoons unsalted butter (melted)
- 1 teaspoon vanilla extract
- Vegetable oil for frying
For the Glaze:
- 1½ cups powdered sugar
- 3 tablespoons milk
- ½ teaspoon vanilla extract
- Food coloring (optional)
The sweet rice flour is non-negotiable. Regular rice flour won’t give you that chewy texture. Find mochiko at Asian grocery stores or online—it’s worth the hunt.
Setting Up Your Mochi Donut Station
First things first—you need a mochi donut pan if you’re baking, or parchment paper cut into squares if you’re frying. I prefer frying because it creates better texture, IMO.
Mix your dry ingredients in one bowl. Sweet rice flour, all-purpose flour, sugar, baking powder, and salt. Whisk them together until everything’s evenly distributed.
In another bowl, combine your wet ingredients. Beat the egg, then add milk, melted butter, and vanilla extract. Mix until smooth and well incorporated.
Pour the wet ingredients into the dry mixture. Stir gently until just combined. Don’t overmix—you’re not trying to develop gluten here. The batter should be thick but pourable.
The Piping Process (This Part’s Actually Fun)
Grab a piping bag or a ziplock bag with the corner cut off. Fill it with your batter. This is way easier than trying to spoon batter into molds.
If you’re using a pan, pipe the batter into greased mochi donut molds. Fill each cavity about ¾ full. They’ll puff up during cooking, so don’t overfill.
For frying, pipe donut shapes onto parchment paper squares. Make them about 3 inches in diameter. The parchment makes transferring them to hot oil much easier and safer.
Create that signature bubble pattern by piping 8 small connected circles in a ring shape. Or honestly? Just pipe a regular ring and it’ll still taste amazing.
Frying Technique for Maximum Crispiness
Heat your oil to 350°F in a deep pot or fryer. Temperature control matters here—too hot and they’ll burn, too cool and they’ll absorb oil like sponges.
Carefully lower the parchment paper with the donut into the oil. The paper will naturally release once the donut starts cooking. Use tongs to remove the paper after a few seconds.
Fry each side for about 2-3 minutes until golden brown. They should look beautifully crispy on the outside. Don’t rush this step—patience creates perfection.
Remove them with a slotted spoon and place on a wire rack over paper towels. Let excess oil drain off while they cool slightly.
Baking Option (Because Not Everyone Loves Frying)
Preheat your oven to 350°F. Grease your mochi donut pan thoroughly—these can stick if you’re not generous with the oil or cooking spray.
Pipe the batter into each cavity. Tap the pan gently on the counter to remove air bubbles. This helps create a smoother surface.
Bake for 12-15 minutes until the tops spring back when touched lightly. They won’t brown as much as fried ones, and that’s completely normal.
Let them cool in the pan for 5 minutes before removing. They’re delicate when hot, so handle them gently. Once cool, they’re surprisingly sturdy for glazing.
Creating Instagram-Worthy Glazes
Mix powdered sugar, milk, and vanilla until smooth. The consistency should coat a spoon but still drip off easily. Add milk by the teaspoon if it’s too thick.
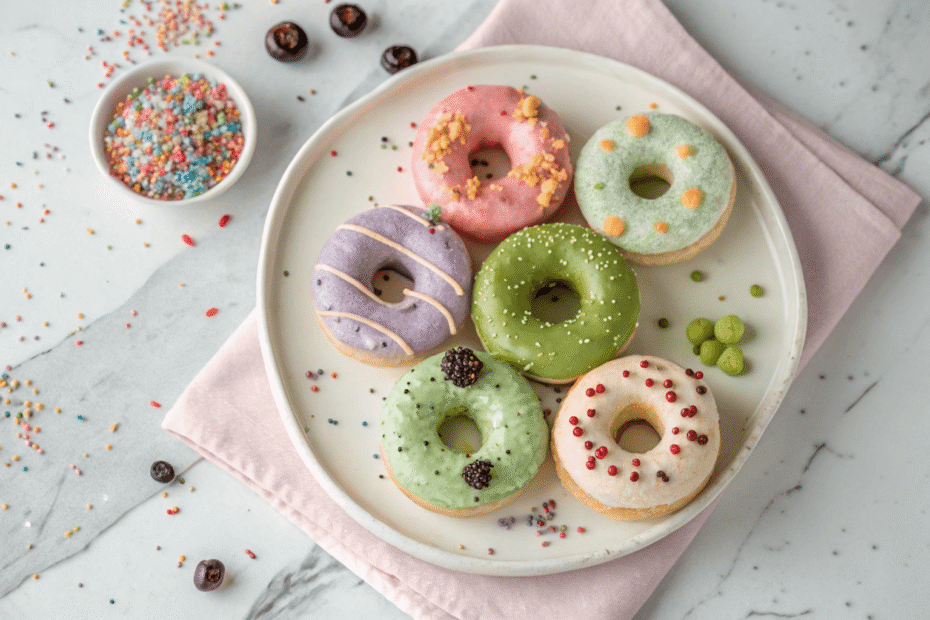
Want colorful cute mochi donuts? Divide your glaze into bowls and add different food colorings. Pastel colors look especially adorable and very donuts aesthetic.
Try flavor variations too. Add matcha powder for green tea flavor, cocoa powder for chocolate, or strawberry powder for pink perfection. The possibilities are endless, really.
For that professional look, dip each donut upside down into the glaze. Let excess drip off, then flip right-side up on the cooling rack.
Toppings That Take Things Next Level
While the glaze is still wet, add your toppings. Sprinkles are classic, but don’t stop there. Get creative with your mochi food presentation.
Crushed freeze-dried strawberries add flavor and gorgeous color. Toasted coconut flakes bring texture and tropical vibes. Chopped nuts provide crunch that contrasts beautifully with the chewy donut.
For a sushi donut inspired look (yes, that’s a thing), use black and white sesame seeds. It mimics the appearance of sushi rolls but tastes like sweet heaven.
Edible flowers, gold leaf, or even cereal pieces work amazingly well. These donuts are your canvas—treat them like the art they deserve to be.
Why My First Batch Was a Learning Experience
Let me tell you about my disasters 🙂 My first attempt? I overmixed the batter and ended up with tough, dense donuts. The mochi texture was completely lost.
Second try, I made the oil too hot. Burnt outsides, raw insides. Not cute. Temperature matters more than you think with these delicate treats.
I also learned that fresh is best. These don’t store as well as regular donuts. The texture changes after a day, losing that perfect crispy-chewy contrast.
But once I figured it out? Total game-changer. Now I make these for every gathering and people lose their minds over them every single time.
The Texture Science Behind Mochi Donuts
Sweet rice flour has different starch molecules than regular flour. It creates a gel-like structure when cooked, giving that signature bounce and chew.
The combination with all-purpose flour prevents them from being too chewy. You want that mochi texture, but not so much that people’s jaws get tired.
Baking powder creates air pockets during cooking. These pockets expand, making the donuts light despite the dense mochi flour base. Chemistry is cool like that.
Flavor Variations You Need to Try
Mochi cookies inspired flavors work beautifully here. Try adding matcha powder to the batter itself, not just the glaze. It creates depth throughout the entire donut.
Ube (purple yam) is huge in mochi desserts. Add ube extract and purple food coloring to the batter for authentic Filipino-Japanese fusion vibes.
Black sesame paste mixed into the glaze creates an earthy, nutty flavor that’s totally addictive. Sprinkle extra sesame seeds on top for visual appeal.
Chocolate lovers? Replace ¼ cup of sweet rice flour with cocoa powder. Top with chocolate glaze and you’ve got double chocolate mochi donuts.
Storage and Reheating Tips
Store these in an airtight container at room temperature for up to 24 hours. Beyond that, the texture starts degrading significantly. They’re definitely best eaten fresh.
If you must store them longer, freeze unglazed donuts in freezer bags. They’ll keep for up to a month. Thaw, warm them up, then add fresh glaze.
To refresh day-old donuts, pop them in a 300°F oven for 3-5 minutes. This re-crisps the exterior slightly. Not perfect, but better than eating them cold.
Microwave reheating works in a pinch—10-15 seconds max. Any longer and they become rubbery. The oven method is definitely superior for texture preservation.
Making These Ahead for Parties
You can prep the batter the night before and refrigerate it. Let it come to room temperature before piping and cooking. This saves time on event days.
Fry or bake them the morning of your party. Glaze them an hour before serving. This timing gives you fresh donuts without last-minute stress.
Set up a DIY glazing station where guests customize their own donuts. Provide multiple glaze colors and topping options. People love interactive food experiences, FYI.
Comparing to Regular Donuts
Traditional yeast donuts take hours because of rising time. Mochi donuts? Ready in 30 minutes start to finish. Major time advantage when cravings hit.
Texture-wise, there’s no comparison. Regular donuts can be great, but they don’t have that addictive chew. Once you go mochi, it’s hard going back.
Calorie-wise, they’re pretty similar. Don’t fool yourself into thinking these are healthier. But honestly? Life’s too short to skip amazing donuts over a few calories.
Why These Donuts Rule Social Media
The bubble ring shape photographs incredibly well from any angle. Each little bubble catches light differently, creating visual interest in photos.
Pastel glazes and creative toppings make them perfect for the donuts aesthetic crowd. They look professional even when you’re just making them at home.
That chewy texture translates to satisfying food videos. Watching someone bite into a mochi donut and seeing that pull? Pure content gold.
Frequently Asked Questions
Can I use regular rice flour instead of sweet rice flour?
Nope, regular rice flour won’t work. Sweet rice flour (mochiko) is glutinous rice flour—that’s what creates the chewy texture. They’re completely different products despite similar names.
Why are my mochi donuts dense and heavy?
You probably overmixed the batter. Mix just until combined, no more. Overmixing develops gluten and makes them tough. Also check that your baking powder is fresh.
Can I make these without a special mold?
Absolutely! Use parchment paper squares and pipe freehand donut shapes. Or use a regular donut pan—they won’t have the bubble pattern but will still taste great.
How do I prevent them from sticking to the pan?
Grease your pan generously with butter or oil. Or use cooking spray. Don’t skimp here—mochi batter is sticky and needs plenty of release agent.
What’s the best oil temperature for frying?
350°F is ideal. Use a thermometer for accuracy. Too hot (375°F+) burns them, too cool (under 325°F) makes them greasy and undercooked inside.

Mochi Donut Recipe: The Chewy, Crispy Treat You’ve Been Missing
8
Donuts30
minutesMochi donuts combine chewy Japanese mochi texture with crispy American donut exterior. Made with sweet rice flour for signature bounce. Quick 30-minute recipe requires no rising time. Can be fried or baked depending on preference. Endlessly customizable with glazes and toppings for creative presentation and flavor combinations.
Ingredients
-
Sweet rice flour/mochiko (1 cup)
-
All-purpose flour (½ cup)
-
Granulated sugar (⅓ cup)
-
Baking powder (1½ tsp)
-
Salt (¼ tsp)
-
Egg (1 large)
-
Whole milk (½ cup)
-
Unsalted butter (2 tbsp, melted)
-
Vanilla extract (1 tsp)
-
Vegetable oil (for frying)
-
Powdered sugar (1½ cups)
-
Milk for glaze (3 tbsp)
-
Vanilla extract (½ tsp)
How To Make
- Mix dry ingredients in bowl
- Combine wet ingredients separately
- Pour wet into dry mixture
- Stir until just combined
- Fill piping bag with batter
- Pipe into greased molds or onto parchment
- Heat oil to 350°F (or preheat oven)
- Fry 2-3 minutes per side (or bake 12-15 min)
- Drain on wire rack
- Mix glaze ingredients together
- Dip cooled donuts in glaze
- Add toppings while wet
- Let glaze set completely
- Serve fresh for best texture
Final Thoughts on Your Mochi Donut Adventure
Making mochi donuts at home seems intimidating until you actually do it. Then you realize it’s totally manageable and wonder why you waited so long.
The ingredients might be slightly different from regular donuts, but the process is straightforward. Mix, pipe, cook, glaze. Nothing complicated about that sequence.
Will your first batch be perfect? Maybe not. But even imperfect mochi donuts taste better than most perfect regular donuts. That’s just facts.
So grab some mochiko flour and get started. Your kitchen’s about to become everyone’s favorite hangout spot. Trust me on this one.