
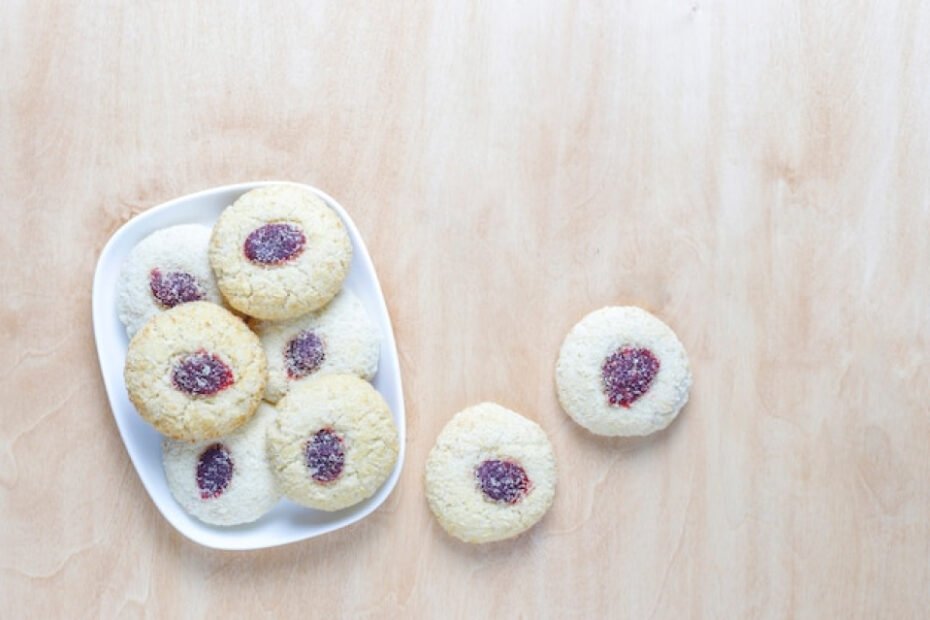
If you’ve ever bitten into a cookie so soft and tender that you questioned reality for a second, you’ve probably tasted something made with White Lily flour. And yes, the hype is real. This White Lily cookie recipe gives you that cloud-soft, melt-in-your-mouth texture that regular flour just can’t produce.
I remember the first time I swapped my usual flour for White Lily. I expected a tiny difference. Instead, I ended up with cookies so soft that my friends asked if I secretly used a magic spell. Honestly, if baking had cheat codes, White Lily would be one.
So today, I’ll walk you through making the softest cookies ever, with fun tips, optional mix-ins, and a few personal touches. Fair warning: after this, you might never use another flour again.
Why White Lily Flour Makes Legendary Cookies
Let’s start with the star of the show — White Lily flour.
Here’s what makes it special:
- It’s made from soft winter wheat, which creates lighter cookies.
- It has lower protein, which keeps cookies tender instead of tough.
- It absorbs moisture differently, giving that ultra-soft texture.
Ever wondered why some cookies turn out dense and crumbly? Usually, the flour is too strong. White Lily steps in like a hero and says, “Relax, I got this.”
If you’re into softer cookies like tiger lily cookie, lilybell cookie, or dreamy cream white baked goods, you’ll love this.
Ingredients (Makes 20–24 Cookies)
- 2 1/4 cups White Lily all-purpose flour
- 1 cup unsalted butter, softened
- 3/4 cup white sugar
- 3/4 cup brown sugar
- 2 large eggs
- 1 teaspoon vanilla extract
- 1 teaspoon baking soda
- 1/2 teaspoon baking powder
- 1/2 teaspoon salt
- 1 cup chocolate chips (optional)
- 1/2 cup chopped nuts (optional)
These quantities give you the perfect balance of softness, structure, and sweetness. And yes, you can customize them like a blue lily cookie or a fun Linzer cookie crk style treat if you’re feeling experimental.
Prep Time: 15 minutes
Cook Time: 10–12 minutes
Total Time: 25 minutes
How to Make White Lily Cookies (Step-By-Step)
Step 1: Cream the Butter and Sugars
Grab a large bowl and beat together the softened butter, white sugar, and brown sugar until creamy and fluffy.
This step creates air pockets that keep the cookies soft. Skipping it leads to dense cookies, and none of us want a cookie that feels like a hockey puck.
Step 2: Add Eggs and Vanilla
Crack in the eggs one at a time, mixing well between each. Then add the vanilla.
Have you ever noticed how vanilla instantly makes your kitchen smell fancy? It’s like scented candles but edible.
Step 3: Mix Dry Ingredients Separately
In another bowl, whisk together the flour, baking soda, baking powder, and salt.
This prevents clumps and ensures even texture. IMO, this step seems boring but saves you from uneven cookies. No one wants a surprise salt pocket.
Step 4: Combine Wet and Dry Ingredients
Slowly add the dry mixture into the butter mixture. Stir until just combined.
Be careful not to overmix. When you overmix, the gluten forms more than it should — and suddenly your cookie behaves like a stubborn biscuit.
Step 5: Add Your Mix-Ins
You can add chocolate chips, nuts, dried fruit, or anything your sweet tooth dreams of.
Want to recreate a soft elder faerie cookie texture? Add white chocolate and macadamia nuts. Feeling like a lilac cookie run vibe? Add tiny sprinkles for a pastel-perfect look.
Step 6: Chill the Dough
Pop the dough into the fridge for at least 30 minutes.
Why chill?
- Prevents spreading
- Enhances flavor
- Gives that soft-chewy center
Have you ever baked cookies without chilling and watched them spread flat like pancakes? Yeah. Let’s avoid that disaster.
Step 7: Bake to Perfection
Preheat your oven to 350°F (175°C).
Line a baking sheet with parchment paper.
Scoop tablespoon-sized balls of dough and place them 2 inches apart. Bake for 10–12 minutes, removing them when the edges look slightly golden.
The centers might look underdone — that’s perfect. They finish cooking as they cool, giving that melt-in-your-mouth finish.
Step 8: Cool and Enjoy
Let the cookies cool on the tray for 5 minutes, then transfer them to a cooling rack.
At this point, the smell alone can make anyone lose self-control. I always tell myself I’ll eat one… then suddenly two are gone. It happens.
Why This Recipe Works Every Time
Here’s the science behind the magic:
1. White Lily flour = guaranteed softness
Its low protein creates tender cookies without toughness.
2. Chilling the dough enhances texture
Cold dough holds shape better.
3. Butter + brown sugar = moisture
Brown sugar locks in softness longer.
4. Slight underbaking = bakery-style centers
Take them out early, and thank me later.
Have you ever tasted a cookie so soft you couldn’t tell if it was baked or if it descended from pastry heaven? That’s this recipe.
Flavor Variations to Try
White Chocolate Macadamia Style
Add white chocolate and nuts for a sweet, nutty twist.
Vintage Lily Cookie Style
Add almond extract to mimic white vintage cake flavors.
Cream White Cookie
Use only white sugar and add a little extra vanilla for a pale, delicate cookie.
Cinnamon Sugar Lily Cookie
Roll your dough in cinnamon sugar for nostalgic bakery vibes.
Blue Lily Cookie Version
Add dried blueberries and white chocolate for fruity elegance.
How to Store These Cookies
- Room temperature: 5–6 days in an airtight container
- Fridge: up to 10 days
- Freezer: 3 months
They freeze beautifully. Warm them for 10 seconds in the microwave and they taste freshly baked.
Perfect Serving Ideas
Serve these cookies with:
- Milk
- Coffee
- Hot chocolate
- Ice cream (cookie sandwiches are dangerously good)
Want something fancy? Plate them with powdered sugar or drizzle melted chocolate on top.
FAQs About White Lily Cookies
1. Can I use regular flour instead of White Lily?
Yes, but the cookies will be denser and less tender. White Lily gives superior softness.
2. Why did my cookies turn out flat?
Your dough was too warm. Always chill before baking.
3. Can I freeze the dough?
Absolutely. Roll into balls, freeze on a tray, then store in bags.
4. Can I make these gluten-free?
Yes, use a gluten-free blend, though the texture may change slightly.
5. What makes White Lily special?
Its soft wheat and lower protein content create lighter, softer baked goods.
White Lily Cookie Recipe: Soft, Buttery, and Absolutely Irresistible
20
servings25
minutesThese White Lily cookies are soft, buttery, and incredibly tender thanks to the magic of low-protein White Lily flour. With simple ingredients and an easy process, you’ll create bakery-style cookies perfect for sharing or keeping all to yourself. They bake quickly, taste amazing, and stay soft for days.
Ingredients
-
2 1/4 cups White Lily all-purpose flour
-
1 cup unsalted butter
-
3/4 cup white sugar
-
3/4 cup brown sugar
-
2 eggs
-
1 teaspoon vanilla
-
1 teaspoon baking soda
-
1/2 teaspoon baking powder
-
1/2 teaspoon salt
-
Optional mix-ins
How To Make
- Cream butter and sugars.
- Add eggs and vanilla.
- Mix dry ingredients separately.
- Combine wet and dry mixtures.
- Add mix-ins.
- Chill dough 30 minutes.
- Scoop onto baking sheet.
- Bake 10–12 minutes at 350°F.
- Cool and enjoy.
Conclusion
This White Lily cookie recipe is the easiest way to get bakery-soft cookies without complicated steps. The flour does most of the work, while you enjoy cookies that feel fluffy, buttery, and irresistible.
If you’ve ever wanted cookies that practically melt on your tongue, try this recipe. Trust me — once you bake with White Lily, you’ll get why bakers swear by it.
Pull out your ingredients, preheat that oven, and let your kitchen smell like sweet perfection.